
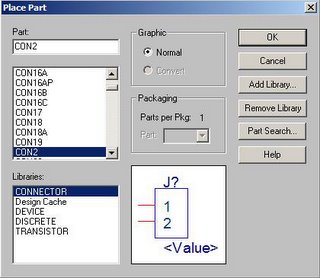
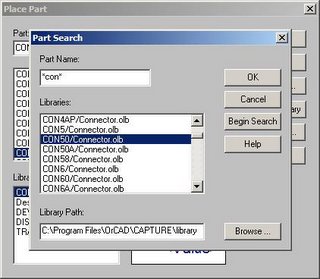
Select the component u want to place and place it on the workspace. If you can not find the component in the list shown, you can opt for Part Search… The best thing about part search is that you can use wild card characters such as *, in your search query. The parts search button appears like as shown in the next figure.
After you find the right component you can press the OK button and place the part in the workspace. When you place the part in workspace, OrCAD automatically names the component and will give you an option to place another one of the same kind. The cursor changes to one of the shape of the component you place. This is shown in the next figure.

A small hint for moving around in OrCAD: use ‘I’ and ‘O’ to zoom in and out, respectively. ‘C’ will
 center the design at your cursor. ‘R’ will rotate a part. You can do these actions while in the middle of another action (e.g. while placing a part). You will also notice that each part has a value associated with it. You can change this by double-clicking the current value. In this manner you can give all your capacitors, resistors, etc. the appropriate values. The actual values don’t matter for your layout. It’s just for identification. Similarly place all the components in the workspace. Now use the wire tool
  to interconnect the different components in the workspace. The final result will look like:
Now its time to apply Design Rules Check (DRC). Select the project window and in the ToolsàDesign Rules Check? Apply design rules that you may want to check. Press OK button and OrCAD reports you any errors that are present in the design you just created. Remove those errors, if any, and continue. Now we can turn our attention to Layout.
No comments:
Post a Comment